
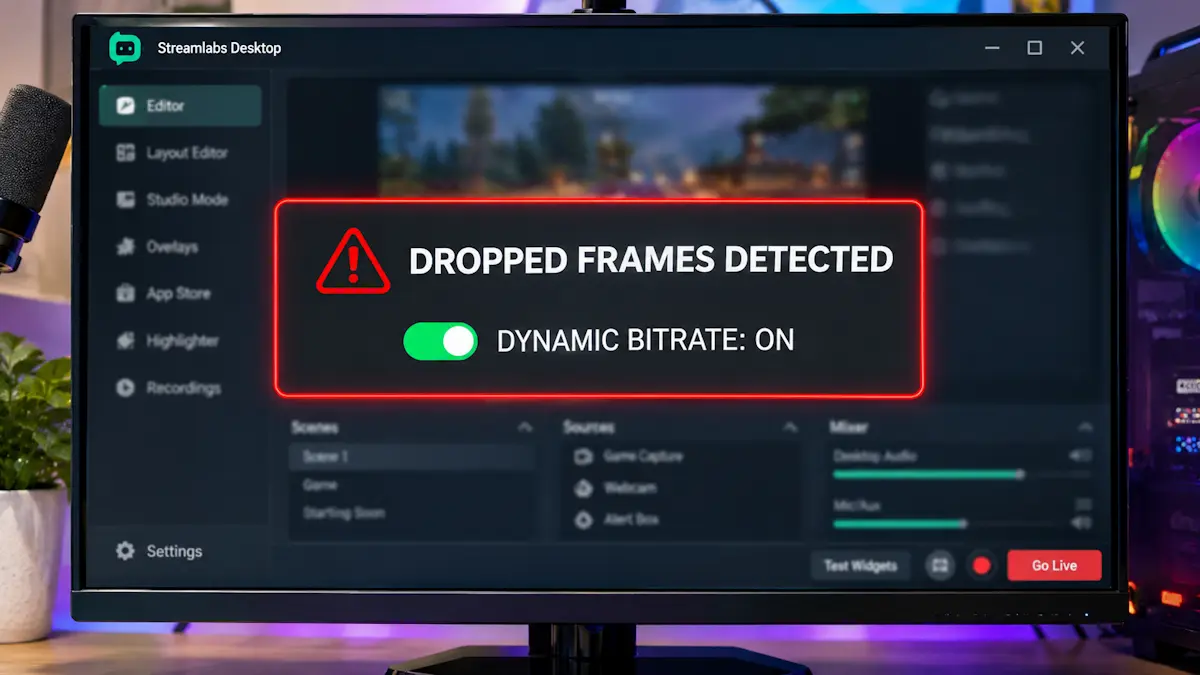
Quick Summary / The 30-Second Fix:
Stop Streamlabs OBS dropped frames on low end PC setups by launching Streamlabs Desktop as Administrator and enabling Dynamic Bitrate under Settings > Advanced > Network. Next, switch your output resolution to 1280×720 at 30 FPS using a hardware encoder (NVENC, QuickSync, or AMF) with Performance Mode enabled.
Works on: Windows 11 (24H2 / 25H2 / 26H2) & Windows 10 | Streamlabs Desktop (2026 Top-Nav Release) / OBS Studio v31+ | Integrated GPUs, GTX 16-Series, RTX 20/30/40/50-Series Blackwell, AMD Radeon RX Series
To resolve Streamlabs OBS dropped frames on low end PC hardware, first separate network packet loss from local encoder saturation. Enabling Dynamic Bitrate inside the Advanced Network menu stops upload bandwidth bottlenecks automatically. For budget systems, turning on Performance Mode with a 60 FPS in-game frame cap reserves essential Direct3D rendering headroom.
Diagnosing Streamlabs OBS Dropped Frames on Low End PC
Streamlabs Desktop lumps three distinct system failures under one generic frame drop alert. Open your live diagnostics panel to pinpoint which hardware or network subsystem is failing.
- Click the Performance Metrics icon on the Streamlabs Desktop Top Navigation Bar during a test stream.
- Dropped Frames (Network): Outbound RTMP packets fail to reach the ingest server due to upload congestion, high jitter, or router bufferbloat.
- Skipped Frames (Encoding Lag): Your CPU (x264) or GPU media engine can’t compress video frames inside the 16.6ms (60 FPS) or 33.3ms (30 FPS) frame window.
- Lagged Frames (Rendering Stalls): Your GPU’s 3D engine hits 99–100% load in-game, starving Streamlabs of the Direct3D resources needed to composite scenes.
| Diagnostic Metric | Primary Bottleneck | Symptom on Stream | Immediate 10-Second Fix |
| Dropped Frames | ISP Upload / Router | Stream freezes or disconnects; local preview stays smooth | Enable Dynamic Bitrate in Settings > Advanced |
| Skipped Frames | CPU / Hardware Encoder | Video stutters every few seconds; audio remains normal | Switch Encoder to NVENC / QSV & Preset to P1–P3 |
| Lagged Frames | GPU 3D Engine (VRAM/Core) | Both game and stream preview hitch simultaneously | Cap in-game FPS & run Streamlabs as Administrator |
Fix 1: Enable Dynamic Bitrate and Network Optimizations
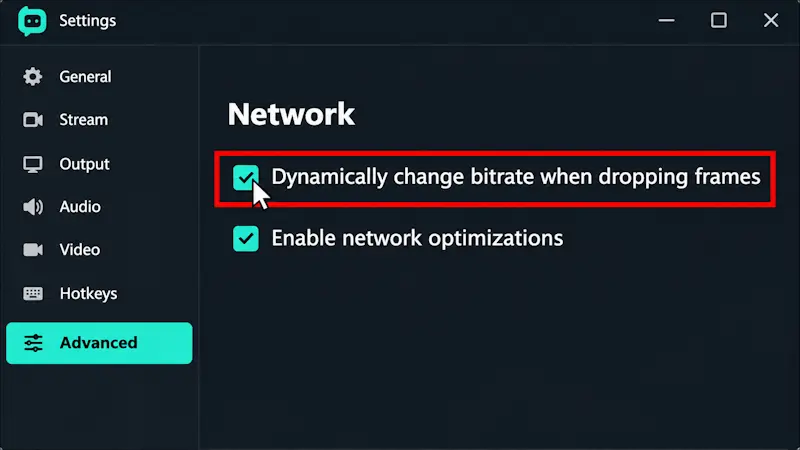
Fixed bitrates clog your outbound upload queue whenever household bandwidth dips on a budget internet plan. Activating network protections prevents Streamlabs OBS dropped frames on low end PC connections by scaling your bitrate dynamically instead of dropping packets.
- Open Streamlabs Desktop and click the Settings gear icon in the bottom-left corner.
- Select Advanced from the sidebar and scroll down to the Network section.
- Check Dynamically change bitrate when dropping frames while streaming.
- Check Enable network optimizations right below it.
- Set Bind to IP to Default, or select your primary Ethernet IPv4 address if you run virtual VPN adapters.
- Navigate to Settings > Output, switch Output Mode to Advanced, and lower Bitrate to 3500 Kbps (720p60) or 2500 Kbps (720p30).
- Verification: Run a 5-minute test stream or follow the Streamlabs Support Ping Test Guide in Command Prompt to verify 0% packet loss.
If your stream still disconnects due to severe ISP routing drops, check our dedicated guide to fix dropped frames and disconnection issues in OBS Studio for deeper router bufferbloat and ingest server tweaks.
Fix 2: Strip Chromium Overhead in Streamlabs Desktop
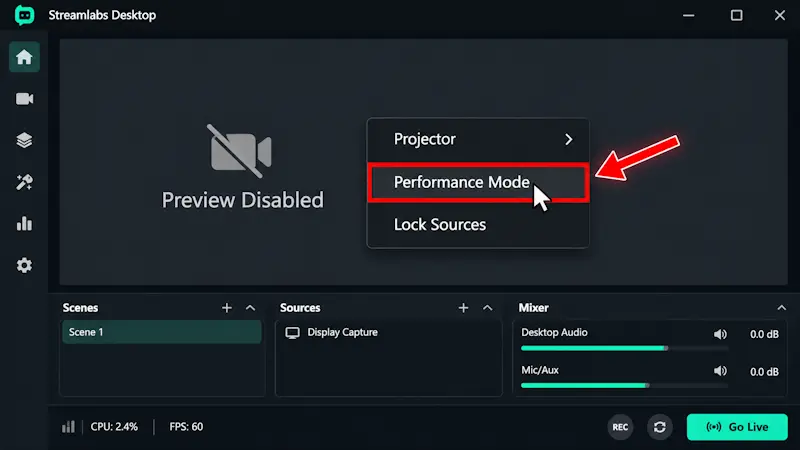
Streamlabs Desktop runs on an Electron and Chromium wrapper that eats far more RAM and CPU cycles than barebones broadcast apps. Disabling live previews and idle browser sources stops Streamlabs OBS dropped frames on low end PC rigs with 8GB to 16GB of RAM.
- Right-click directly on the live video canvas inside the Streamlabs Editor tab.
- Click Performance Mode from the dropdown menu.
- This kills the real-time monitor preview, freeing up 10% to 15% of your CPU and GPU cycles without affecting your viewers’ feed.
- Double-click each Browser Source (Alert Box, Chat Box, Event List) in your Sources list.
- Scroll down and check Shutdown source when not visible.
- Check Refresh browser when scene becomes active in the same window.
- Go to Settings > Advanced > Sources and uncheck Enable Browser Source Hardware Acceleration if your budget GPU has 4GB of VRAM or less.
- Verification: Open Windows Task Manager (
Ctrl + Shift + Esc) and confirm thatStreamlabs Desktopbackground processes drop in RAM and CPU usage.
Fix 3: Dial In Low-Spec Encoder and Canvas Settings
Pushing 1080p60 video on entry-level silicon guarantees encoder overload. Downscaling your output resolution and cutting extra CUDA passes cuts your hardware workload by over 50%.
Best Encoder Settings for Streamlabs OBS Dropped Frames on Low End PC

- Open Settings > Video in Streamlabs Desktop.
- Keep Base (Canvas) Resolution matched to your native monitor resolution (
1920x1080). - Change Output (Scaled) Resolution to 1280×720.
- Set Downscale Filter to Bilinear (Fastest) or Bicubic (Sharpened scaling, 16 samples)—never use Lanczos on budget GPUs.
- Set FPS Type to Common FPS Values and choose 30 FPS for integrated graphics, or 60 FPS for dedicated GPUs.
- Open Settings > Output and set Output Mode to Advanced.
- Pick your dedicated hardware encoder under Streaming: select Hardware (NVENC) (new) for NVIDIA, Hardware (QSV) for Intel iGPUs, or Hardware (AMD) for Radeon cards.
- If your system lacks a hardware encoder, select Software (x264) and set CPU Usage Preset to ultrafast or superfast.
- For NVIDIA NVENC, set Preset to P1: Fastest or P2: Faster, and set Multipass Mode to Single Pass.
- Uncheck both Look-ahead and Psycho Visual Tuning so Streamlabs doesn’t steal active CUDA cores from your game.
- Verification: Start a test recording or stream and confirm the Skipped Frames counter stays locked at
0%.
Severe CPU or encoder overload often causes microphone delay alongside skipped frames. If your voice lags behind your webcam after adjusting encoder presets, follow our steps to fix OBS audio out of sync when streaming.
Fix 4: Prioritize Direct3D GPU Scheduling in Windows 11
Streamlabs needs your graphics card to assemble and render every scene before the encoder ever touches a frame. As detailed in the OBS Project GPU Overload Troubleshooting Guide, Windows starves your broadcast app of Direct3D cycles whenever an uncapped game pins your GPU at 100%.
- Close Streamlabs Desktop completely.
- Right-click your Streamlabs Desktop shortcut and click Properties.
- Open the Compatibility tab, check Run this program as an administrator, and click Apply.
- Administrator privileges let Streamlabs claim high-priority GPU scheduling on the Windows Desktop Window Manager (DWM) thread.
- Press
Win + Ito open Windows Settings and go to System > Display > Graphics > Advanced graphics settings. - Toggle Hardware-accelerated GPU scheduling (HAGS) to Off and reboot your PC if you use an older 4GB or 6GB GTX/RTX card.
- Cap your in-game frame rate to 60 FPS (or a locked multiple like 120 FPS) so your GPU load stays below 85%.
- Review the Streamlabs Game Settings Optimization Guide to dial back VRAM-heavy settings like volumetric fog and shadow cascades.
- Verification: Check the GPU column in Task Manager while gaming to confirm 3D usage stays between 80% and 90%.
Assigning GPU priority on Optimus laptops with both integrated and dedicated graphics can occasionally break screen sharing. If your desktop preview goes blank after tweaking Windows graphics settings, see our fix for OBS display capture not working on a dual GPU laptop.
Fix 5: Clean Up Scene Collections and Capture Hook Conflicts
Stacking conflicting capture sources inside a single scene causes severe frame buffer stalls (download_frame delays over 16.6ms) on motherboards with older PCIe 3.0 lanes. Cleaning up your active sources resolves Streamlabs OBS dropped frames on low end PC setups without spending a dime on upgrades.
- Inspect every Scene inside your active Scene Collection.
- Delete any Display Capture source sitting in the same Scene as a Game Capture source.
- Use Game Capture set to Capture specific window for all full-screen titles.
- Right-click your Game Capture source, click Properties, and check Limit capture framerate.
- Double-click your Video Capture Device (Webcam) source and set Resolution/FPS Type to Custom.
- Lower the webcam Resolution from
1920x1080to1280x720or854x480to stop uncompressed USB video from eating 15% of your CPU. - Verification: Switch between scenes during a test stream and verify that transitions don’t spike CPU usage or clip audio.
Switching from Display Capture to Game Capture saves massive GPU headroom, though some anti-cheat titles block the hook. If your game window fails to render, follow our walkthrough on the OBS game capture black screen Windows 11 fix.
Fix 6: Advanced OS, Driver, and Cache Repairs
⚠️ Safety & Data Backup Warning: Back up your Scene Collections to the cloud (Settings > Scene Collections > Export Overlay File) before wiping roaming cache folders or editing network adapter settings. Modifying drivers or clearing
%appdata%directories without a backup can erase local stream keys, LUT paths, and audio filters.
Corrupted Electron shader caches and aggressive LAN power-saving states often block the render pipeline on older systems.
Step 1: Disable Network Adapter Power Saving & Interrupt Moderation

Budget motherboard LAN controllers frequently batch packets or enter low-power sleep states mid-stream, causing micro-stutters.
- Press
Win + Xand click Device Manager. - Expand Network adapters, right-click your active Ethernet controller (Realtek PCIe GbE or Intel Ethernet), and select Properties.
- Open the Power Management tab and uncheck Allow the computer to turn off this device to save power.
- Open the Advanced tab, click Energy Efficient Ethernet (EEE), and set Value to Disabled.
- Select Interrupt Moderation in the same list and set Value to Disabled to force instant packet transmission.
- Verification: Wait 5 seconds for your Ethernet adapter to reset, then run a stream test to confirm flat Kbps output.
Step 2: Wipe Corrupted Streamlabs Roaming Cache & Update Drivers
Bloated Chromium cache directories cause background memory leaks and frame pacing spikes over time.
- Close Streamlabs Desktop completely.
- Press
Win + R, type%appdata%, and press Enter. - Right-click the
slobs-clientfolder and copy it to your Desktop as a backup. - Open the
slobs-clientfolder and delete theCache,Code Cache, andGPUCachefolders. - Leave
SceneCollectionsandplugin_configintact so you don’t lose your layouts. - Download the latest GPU driver from the Official NVIDIA Driver Downloads portal (or AMD/Intel’s driver site) and run a Custom > Clean Installation.
- Verification: Relaunch Streamlabs Desktop to let it rebuild a clean shader cache with lower baseline RAM usage.
For older dual-core laptops that still choke on Electron’s memory footprint, importing your scenes into the barebones Official OBS Studio Download client saves 300MB to 500MB of RAM. If you also route your webcam feed to voice chat and hit driver conflicts, check our guide on the Discord not detecting OBS virtual camera fix.
Common Mistakes to Avoid
- Lowering your Video Bitrate to fix Skipped or Lagged Frames: Bitrate only controls your internet upload stream—dropping from 6000 Kbps to 2000 Kbps won’t relieve an overloaded CPU or GPU encoder.
- Stacking Animated WebM Overlays without Hardware Decoding: Running multiple looping 1080p60
.webmor.mp4overlays forces your CPU to decode video streams in the background—replace static borders with.pngfiles and check Use hardware decoding when available on all Media Sources.
Frequently Asked Questions (FAQs)
Why is Streamlabs dropping frames when my internet upload speed is fast?
Fast speed test results won’t stop Streamlabs OBS dropped frames on low end PC builds if those drops are actually “Skipped” or “Lagged” frames from CPU or GPU overload. When diagnostics confirm real network drops despite fast upload speeds, your connection is hitting Wi-Fi interference, router bufferbloat, or ISP throttling.
Should I use x264 or NVENC on a low-end PC for Streamlabs?
Always select Hardware (NVENC), Intel QuickSync (QSV), or AMD AMF instead of Software (x264) on a budget gaming PC. Dedicated hardware encoders run on an isolated silicon chip on your graphics card, compressing video with almost zero impact on your CPU or in-game frame rate.
Does Performance Mode in Streamlabs affect what my viewers see?
No, turning on Performance Mode only disables the live video preview window on your local monitor. Your audience on Twitch, YouTube, or Kick still sees your full-resolution gameplay, webcam, and alerts while your PC saves up to 15% of its CPU and GPU rendering resources.
What is the best bitrate and resolution for streaming on a budget PC?
The ideal configuration for entry-level hardware is 1280×720 resolution at 30 FPS with a bitrate between 2500 Kbps and 3500 Kbps. This setup cuts pixel processing demands by over 65% compared to 1080p60 while delivering a sharp, smooth broadcast on mobile and desktop screens.